Picture a Sunday afternoon in your kitchen. A heavy pot simmers on the back burner, sending the earthy, comforting aroma of dried pinto beans through the house. You did exactly what conventional cooking wisdom dictates: you salted the water generously right at the start, treating it like pasta water so the flavor would permeate the core of every single bean. But three hours later, you dip your spoon in for a taste test, and instead of creamy comfort, you find a bowl of gravel. The broth is rich and fragrant, but the beans themselves fight back, stubborn and hard against your teeth. It is a quiet, infuriating domestic defeat. You are not alone in this frustration. The culprit is not your stove, and it is certainly not your lack of skill. The sabotage came from the salt shaker.
The Armor of the Bean
For decades, home cooks have been taught that seasoning early is the foundation of good flavor. While that holds true for a roast or a bubbling pot of marinara, dried legumes operate under an entirely different set of physical laws. Think of a dried bean as a tiny, tightly closed fist. Its sole biological purpose is to protect the nutrients inside until the perfect conditions for growth arrive. When you drop that bean into boiling water, you are initiating a dialogue with its cellular structure. If you introduce salt into that conversation too early, the bean puts up its armor.
I learned this lesson the hard way, standing in the cramped, steam-filled kitchen of a seasoned Oaxacan chef in Los Angeles. I reached for the kosher salt as a fresh pot of black beans came to a rolling boil. She gently batted my hand away with a wooden spoon. She warned me that if I salted them now, they would put on their coats. She explained that beans are inherently stubborn, and you have to wait until they completely surrender to the heat before you offer them flavor. Her pots of beans were legendary—creamy, intact, and rich—and her secret was simply a matter of patience and timing.
| Target Audience | Specific Benefits of Delayed Salting |
|---|---|
| Daily Home Cooks | Avoids wasted hours simmering ruined, crunchy beans that never soften. |
| Sunday Meal Preppers | Ensures creamy, consistent textures that hold up perfectly in weekly lunches. |
| Budget Shoppers | Transforms inexpensive, bulk pantry staples into luxurious, satisfying meals. |
To understand why this happens, we have to look at the chemistry of the pot. The outer skin of a bean is held together by pectin, a complex carbohydrate that acts like cellular glue. When you boil beans in plain, fresh water, the heat gradually dissolves this pectin, allowing moisture to penetrate and soften the starchy interior. However, when you add sodium chloride to the water right away, the calcium and magnesium ions in the salt bind with the pectin. Instead of breaking down, the pectin becomes fortified. The salt effectively acts like mortar, reinforcing the brick wall of the bean’s skin. The exterior becomes permanently tough, and no amount of boiling will ever make it truly tender.
| Pot Ingredient | Mechanical Effect on the Bean |
|---|---|
| Plain Boiling Water | Dissolves the pectin layer slowly, allowing hydration and deep softening. |
| Sodium (Salt) | Fortifies the pectin structure, making the exterior impenetrable to moisture. |
| Acid (Tomatoes/Vinegar) | Stiffens the cellular walls similarly to salt; must also be added at the very end. |
The Rhythm of the Pot
- Imported Hass avocados face unprecedented supermarket price surges following border inspections.
- Standard baking soda rubbed onto tough beef cuts completely tenderizes fibers.
- Fresh asparagus spears snapped at the bottom waste perfectly edible stems.
- Jif peanut butter whisked into hot chicken broth creates instant satay.
- Hellmanns Mayonnaise Produces Superior Grilled Cheese Crusts Over Traditional Butter
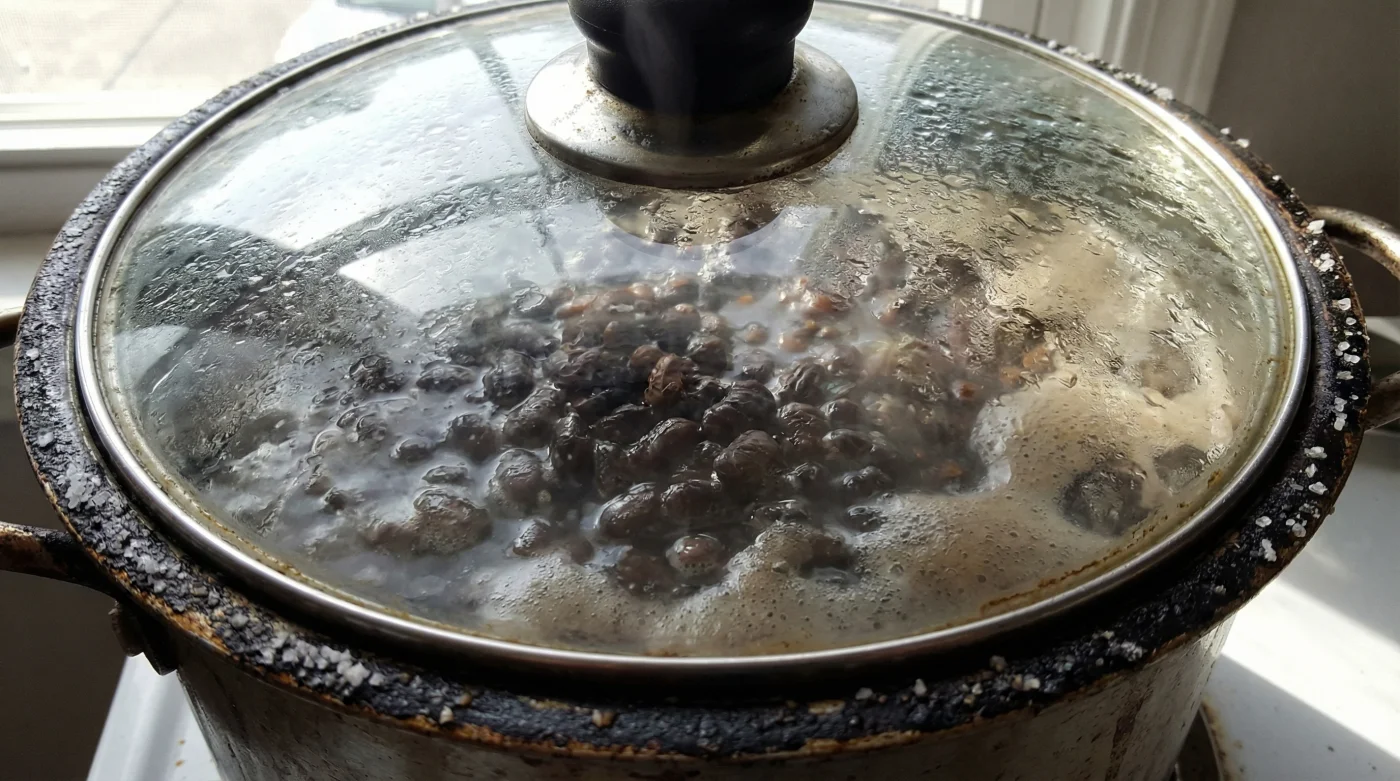
Leave the salt shaker in the pantry. You can add aromatics like a halved onion, a few cloves of smashed garlic, or a bay leaf, but absolutely no sodium. Let the beans roll in the bubbling water, checking on them occasionally to ensure they remain submerged. You are waiting for the physical tell that indicates they have surrendered.
After an hour or two, depending on the age and variety of the bean, pull one out and blow on it. If the skin peels back slightly and the interior yields to a gentle pinch between your thumb and index finger, you have reached the turning point. The pectin has softened, and the doors are wide open.
Now, and only now, you salt the water aggressively. Because the beans are fully tender and their pores are open, the seasoned broth will rush inside. Let them simmer for another fifteen to twenty minutes to absorb the flavor, and you will have achieved absolute textural perfection.
| Cooking Phase | What to Look For | What to Avoid |
|---|---|---|
| The Beginning | A gentle, steady simmer with fresh, plain water and aromatics. | Adding salt, bacon, broth, or any acidic ingredients like tomatoes. |
| The Turning Point | Skins peeling back slightly; a soft, yielding texture when pinched. | Rapid, aggressive boiling that causes the beans to blow out and turn to mush. |
| The Finish | Opaque cooking liquid that thickens slightly after the salt is added. | Turning off the heat immediately after salting; allow time for absorption. |
Patience on a Simmer
Cooking is often an exercise in letting go of control. It is a reminder that not everything in our homes can be forced into submission right from the start. We are so accustomed to multitasking and rushing through our evening routines that standing over a stove and waiting for a physical change feels almost radical. But the humble dried bean demands respect for its process. You have to let the heat do its quiet, invisible work before you demand flavor.
By withholding the salt until the very end, you are doing more than just fixing a common kitchen error. You are shifting your relationship with your pantry. The peace of mind that comes with knowing a cheap bag of dried goods will turn out creamy, luxurious, and perfect every single time is worth the wait. It turns an unpredictable chore into a reliable, rhythmic comfort.
Cooking is a conversation with your ingredients; if you shout with seasoning too early, the food will simply stop listening.
Frequently Asked Questions
Why do my beans stay hard even after boiling for four hours?
If you added salt, broth, or acidic ingredients like tomatoes at the beginning, the exterior pectin hardened, preventing the beans from ever softening. Old beans that have sat in your pantry for years can also remain permanently tough regardless of how you cook them.
Can I use chicken broth to boil dried beans?
Commercial chicken broth contains high levels of sodium. If you use it from the start, you risk toughening the beans. Use plain water or a completely unsalted homemade stock for the initial boil.
Does baking soda help soften tough beans?
Yes. Adding a tiny pinch of baking soda to the soaking or boiling water creates an alkaline environment that breaks down pectin faster. However, use it sparingly, as too much can leave a soapy taste and cause the beans to disintegrate.
When exactly is the right time to add salt?
Add salt only when you can easily mash a bean between your fingers with no hard, chalky resistance in the center. Once they reach this fully tender state, salt generously and simmer for another 15 minutes.
What about canned beans? Do I need to worry about salt with them?
No. Canned beans have already been cooked to tenderness in a pressure-sealed environment before being packaged. You can heat them and season them immediately without worrying about altering their texture.