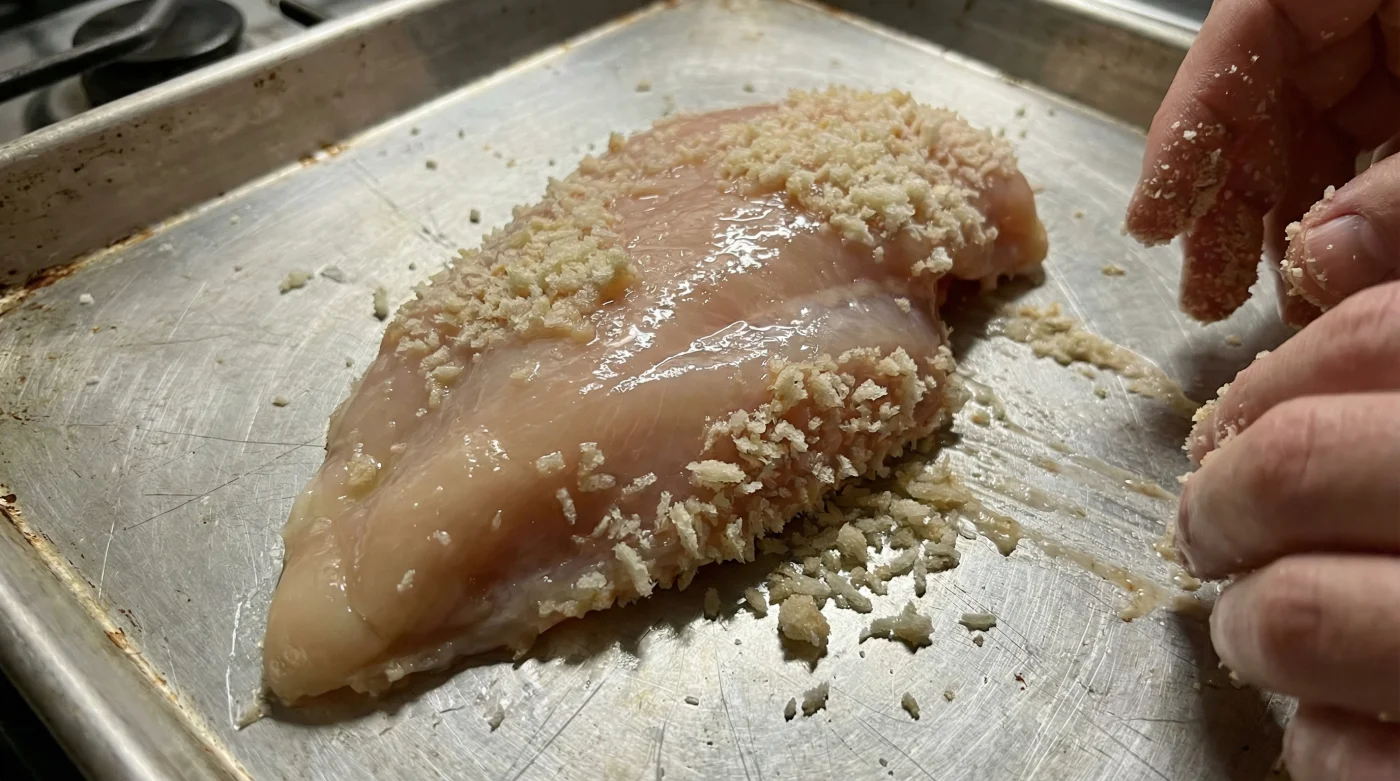
You stand by the stove, tongs in hand, watching a culinary tragedy unfold in the skillet. The oil sizzles with promise, but as you carefully flip the chicken breast, the golden, jagged crust stays behind. It slides off the meat like a heavy, wet sweater. You are left staring at a pale, bare piece of poultry in the center of the pan, while standard Panko breadcrumbs float aimlessly in the hot fat, burning into sad debris. You pressed those crumbs on so firmly. The chicken was damp right out of the package—shouldn’t that surface moisture have acted like glue?
It is one of the most common, heartbreaking moments in home cooking. You spend twenty minutes prepping a beautiful family dinner, only to watch the texture completely disintegrate. The frustration is real, and it usually ends with you scraping the burnt crumbs out of the pan and serving a meal that feels like a compromise.
The Myth of the Wet Canvas
There is a perfectly logical assumption that plagues almost every beginner cook: wet things are sticky. Therefore, a wet piece of meat should easily grab and hold onto dry ingredients. But in the world of frying and baking, applying dry Panko directly to wet poultry is like trying to build a brick house on a swamp. The foundation simply cannot hold the weight.
Chicken naturally weeps moisture. When standard Panko breadcrumbs are pressed onto wet chicken breasts, they completely fail to adhere because the breadcrumbs absorb that surface water and immediately swell. Instead of creating a bond, the water creates a slippery barrier. The moment heat is introduced, the steam pushes the heavy, saturated crumbs right off the meat.
| The Home Cook Profile | Common Frustration | The Structural Benefit |
|---|---|---|
| The Busy Parent | Chicken tenders look sad and naked after baking. | A crust that survives the oven and the lunchbox. |
| The Meal Prepper | Breading gets soggy in the fridge by Tuesday. | A waterproof barrier that maintains a firm bite for days. |
| The Comfort Craver | Crust separates entirely when cutting into the meat. | A unified bite where meat and crust perform as one. |
Years ago, I spent an afternoon watching a veteran line cook named Sarah maneuver through a chaotic Friday dinner service. She was effortlessly dropping dozens of perfectly breaded cutlets into the fryers. When I asked her how she never lost a single patch of crust, she wiped her hands on her apron and laughed. ‘You have to stop treating the chicken like a sponge,’ she told me. ‘Treat it like a wall that needs painting. You can never paint over a wet wall without a primer.’
That primer is the cornerstone of the classic dry-wet-dry sequence. It is a mandatory architectural process that creates a waterproof glue for the crust. Skipping even one of these three steps guarantees a structural collapse.
| The Sequence | Mechanical Action | The Scientific Reality |
|---|---|---|
| Step 1: Dry (Flour) | Creates a bone-dry, textured surface. | Flour absorbs residual moisture and gives the egg proteins a rough surface to grip. |
| Step 2: Wet (Egg Wash) | Acts as the primary adhesive. | Egg proteins coagulate when heated, forming a flexible, waterproof binder. |
| Step 3: Dry (Panko) | Provides the final protective shell. | The airy flakes of Panko attach to the sticky egg, shielding the meat from direct heat. |
The Architecture of the Crust
To fix this frustrating error, you have to embrace the rhythm of the standard breading station. First, take a paper towel and aggressively pat your chicken breasts completely dry. Do not be gentle. Remove every visible drop of surface moisture. This simple physical action is the most crucial, yet most overlooked, step in the entire process.
- Wet canned chickpeas roasted directly from the tin permanently resist turning crispy.
- Store-bought gnocchi boiled in water ruins the classic potato texture.
- Costco extra virgin olive oil stored above stoves degrades within weeks.
- Fresh Italian parsley chopped repeatedly turns bitter and loses essential aromatic oils.
- Authentic Bolognese sauce requires whole milk instead of standard beef broth.
Move to the second dish, which holds your beaten eggs. Submerge the floured chicken completely. The egg will instantly cling to the dry flour dust. Lift the meat and let the excess egg drip back into the bowl for three seconds. If you carry too much egg over to the next station, you will end up with clumps instead of an even coating.
Finally, drop the chicken into the third dish holding your Panko. With a dry hand, pile a mound of breadcrumbs directly on top of the meat. Press down with firm, intentional pressure. You are forcing the jagged edges of the Panko into the tacky egg layer. Transfer the finished piece to a wire rack and let it rest for five minutes before cooking. This resting period allows the egg to slightly dry and cement the bond.
| Breading Component | What to Look For | What to Avoid |
|---|---|---|
| The Chicken | Bone-dry to the touch before flouring. | Glossy, weeping, or straight from the fridge in a pool of liquid. |
| The Egg Wash | Fully beaten until yolks and whites are a seamless liquid. | Stringy bits of unbroken egg white, which cause bald spots. |
| The Panko | Crisp, large flakes stored in an airtight container. | Stale, dusty crumbs that have absorbed kitchen humidity. |
Beyond the Skillet
Mastering this simple technique changes the entire atmosphere of your kitchen. The anxiety of the flip disappears. You no longer hold your breath, wondering if the dinner you promised your family will end up as a mess in the bottom of a pan. Instead, you hear the satisfying scrape of a spatula against a perfectly unified, golden shell.
Cooking at home should never feel like a battle against your ingredients. When you understand how moisture and friction interact, you take control of the food. It is no longer just about getting dinner on the table; it is about finding peace of mind in the process. You build a sturdy foundation, you respect the ingredients, and you sit down to a meal that looks and tastes exactly the way you intended.
The difference between a frantic cook and a confident one is simply knowing how to build a crust that respects the meat beneath it.
Frequently Asked Questions
Can I substitute milk for the egg wash?
Milk lacks the necessary proteins to bind heavy Panko. If you cannot use eggs, a slurry of water and cornstarch works as a highly effective, sticky alternative.Why do my breadcrumbs burn before the chicken is cooked?
Your oil is too hot, or your chicken breast is too thick. Pound the chicken to an even half-inch thickness so the meat cooks at the same rate the crust browns.Do I have to use all-purpose flour for the first step?
No. Rice flour or cornstarch are fantastic gluten-free alternatives that actually create an even crispier barrier against the chicken’s natural moisture.How long can I let the breaded chicken rest before frying?
Letting it rest on a wire rack for 5 to 15 minutes is ideal. If left much longer than 30 minutes, the moisture from the chicken will eventually seep through and ruin the crust.Can I reuse leftover Panko from the breading station?
Absolutely not. Once raw chicken has touched the breadcrumbs, any leftovers must be discarded immediately to prevent bacterial growth.